Installing an interior door is more than placing a door slab into an opening and fastening the frame. A successful installation depends on accurate measurements, the correct jamb depth, a plumb and square frame, proper shimming, and consistent clearances around the door.
These details become even more important in new construction and multi-home projects. If one door specification is incorrect—such as jamb depth, handing, or rough opening size—the same problem may be repeated across dozens of openings.
This guide explains interior door installation from preparation through final adjustment, including the tools required, how to install a door frame, how to install a prehung door, and the most common installation mistakes to avoid.
What Do You Need to Install an Interior Door?
Having the correct tools ready before installing an interior door makes it easier to maintain accurate alignment and avoid unnecessary adjustments.
Essential Tools
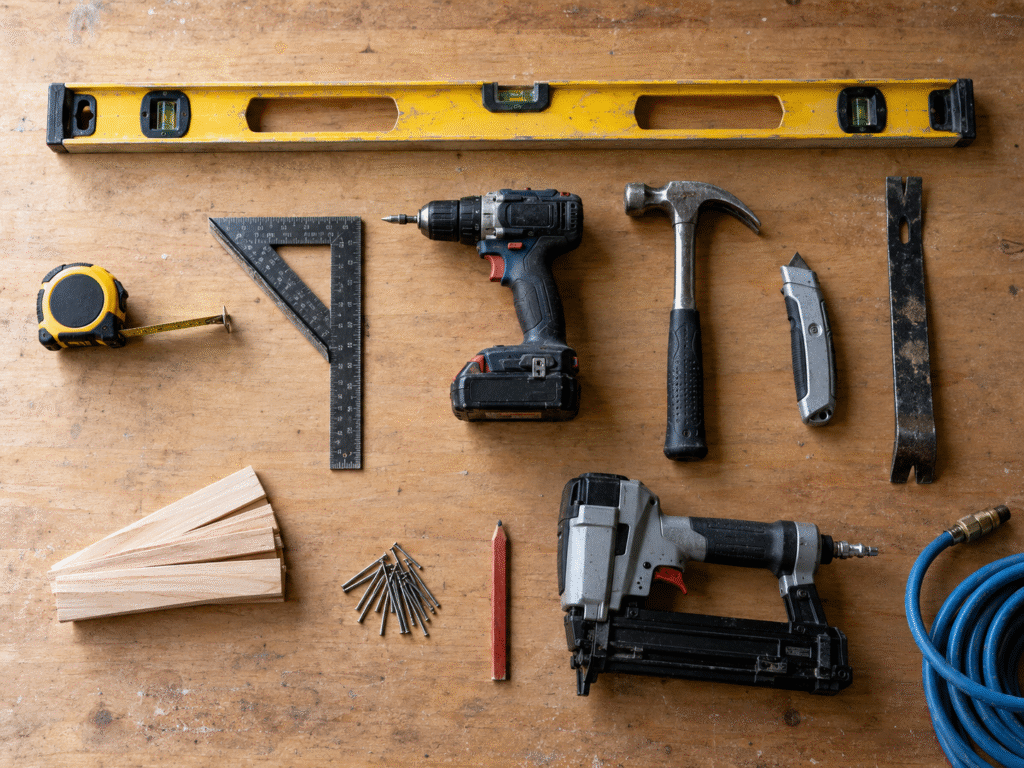
Common installation tools include:
- Tape measure
- 4- or 6-foot level
- Carpenter’s square
- Drill/driver
- Hammer
- Utility knife
- Pry bar
- Pencil
- Wood shims
- Finish nailer or finish nails
A long level is particularly useful because the hinge-side jamb must be installed plumb. Checking only short sections of the frame can miss bowing or twisting.
Materials and Hardware
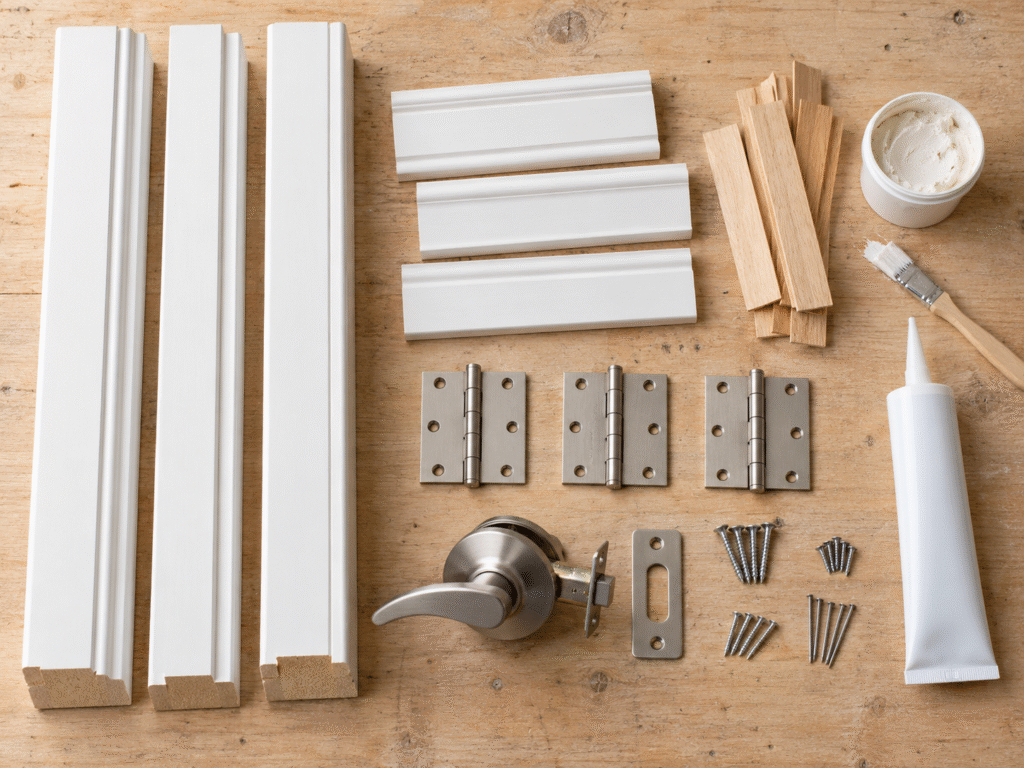
Depending on the door system, you may also need:
- Interior door slab or prehung door
- Door jamb
- Hinges
- Casing
- Lockset
- Strike plate
- Wood shims
- Installation screws or nails
- Wood filler or caulk
- Touch-up primer or paint
Before starting, confirm that the door size, jamb depth, handing, swing direction, and hardware preparation match the opening.
Installation requirements can vary depending on the door type, frame configuration, and opening system. Our range of interior doors includes different configurations that can be matched to the opening and installation conditions.
How to Install an Interior Door Step by Step
Step 1: Measure the Rough Opening
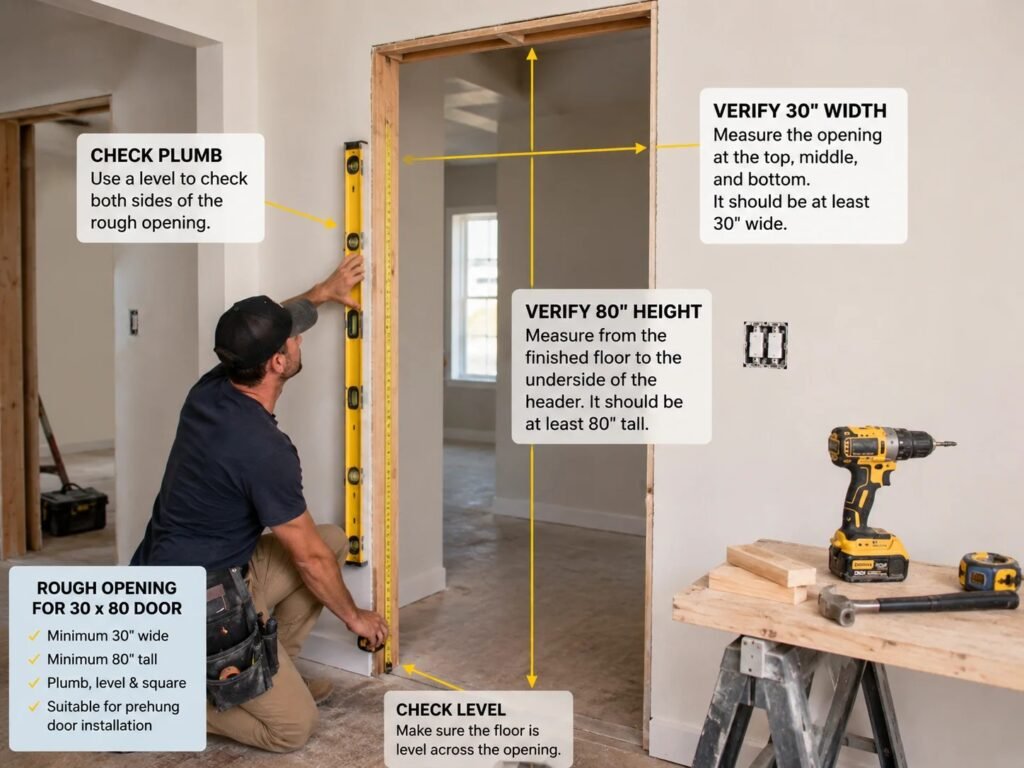
Measure the rough opening at multiple points rather than taking a single measurement.
Check:
- Opening width at the top, middle, and bottom
- Opening height on both sides
- Wall thickness
- Floor level
- Whether the studs are plumb
- Whether the opening is square
Remember that the rough opening is larger than the actual door slab. The required allowance depends on the door system and manufacturer.
For multi-unit construction, verify several framed openings before ordering doors in volume. Do not assume every opening is identical simply because the drawings specify the same door size.
Step 2: Prepare the Rough Opening
Remove debris, protruding nails, screws, and other obstructions.
Check the subfloor and finished-floor condition as well. Flooring thickness matters because tile, SPC, hardwood, or carpet can change the final clearance beneath the door.
The opening does not have to be perfectly square, but there must be enough room to position and shim the frame correctly.
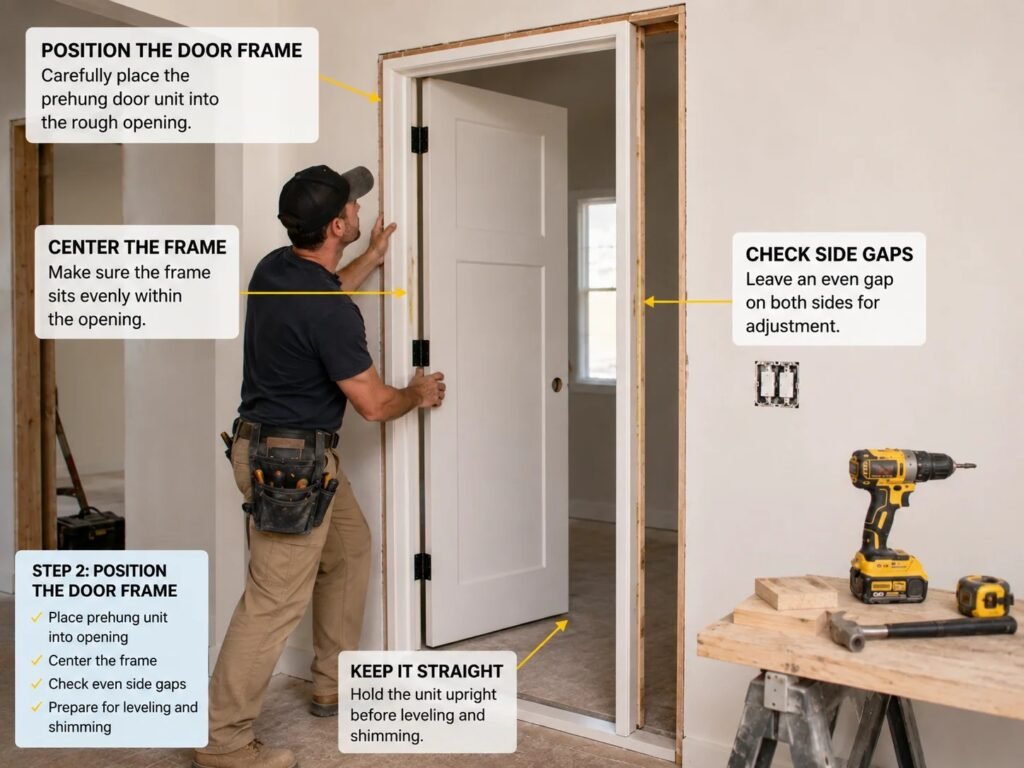
Step 3: Position the Door and Frame
Place the door assembly into the opening and confirm the handing and swing direction before fastening anything.
Check that the jamb is positioned correctly relative to the finished wall surfaces. This is especially important when learning how to install a door frame, because an incorrect jamb depth can prevent the casing from sitting properly against the wall.
Step 4: Shim the Hinge-Side Jamb
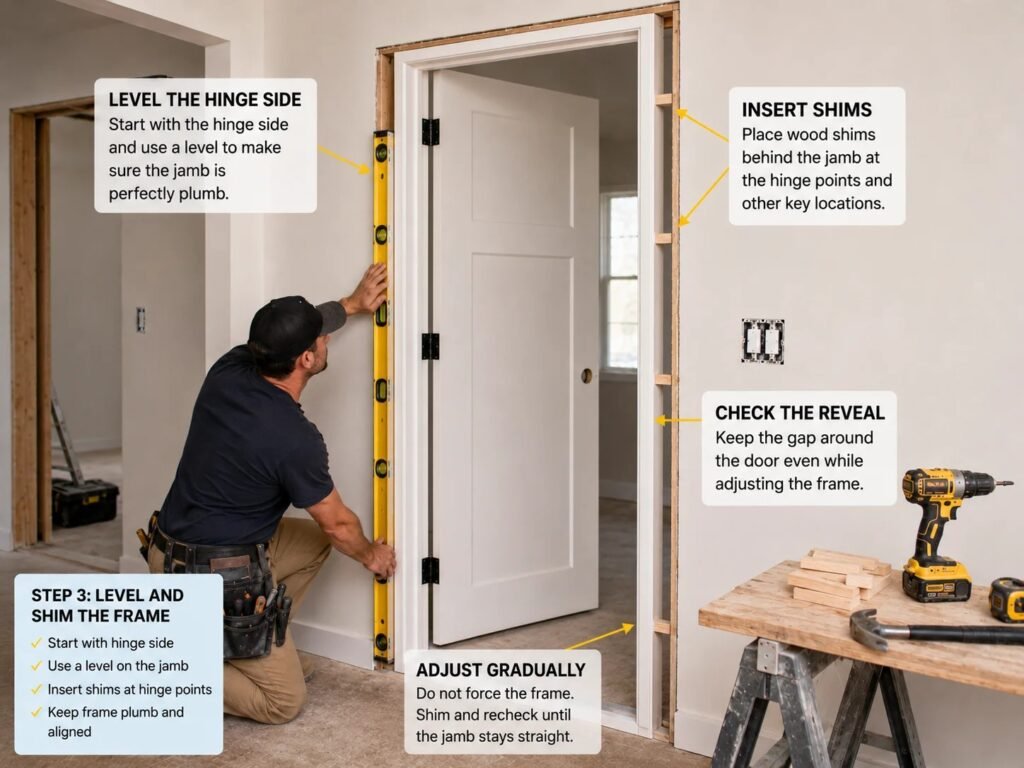
Start with the hinge side.
Place shims near the hinge locations and use a long level to bring the jamb perfectly plumb. The shims support the frame and create a solid connection between the jamb and wall framing.
Do not force the jamb into position by overtightening a fastener. This can bow the frame.
Step 5: Secure the Door Frame
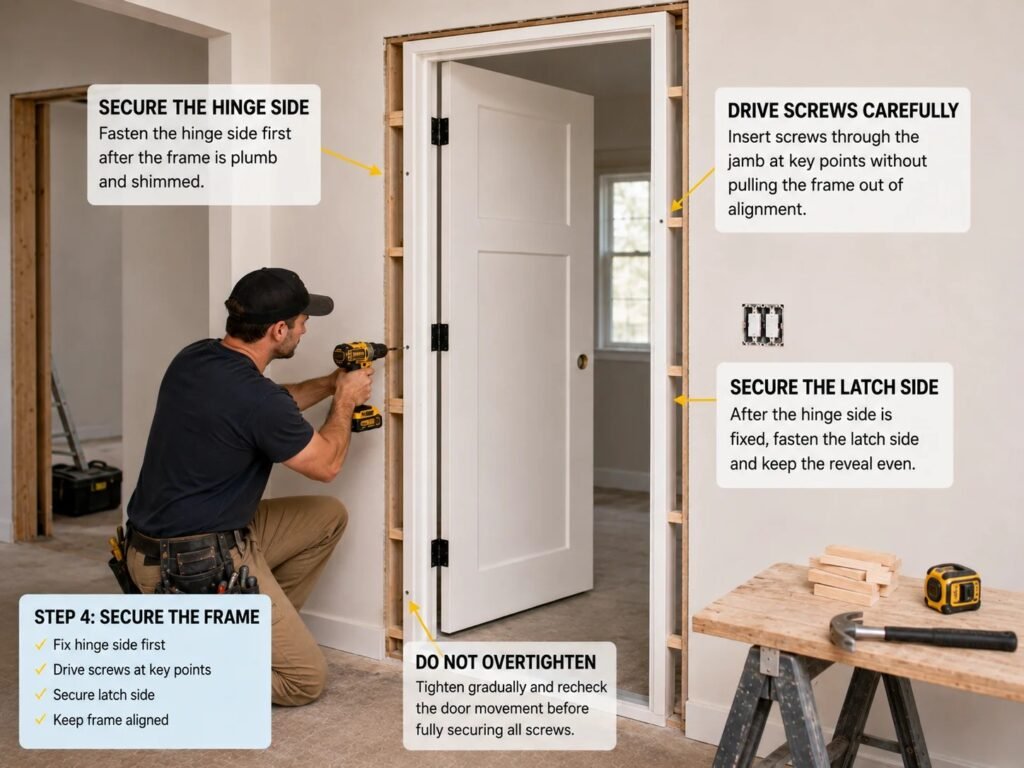
Fasten through the jamb and shims into the framing.
Work progressively and continue checking the jamb with your level. Do not fully tighten every fastener before confirming alignment.
A door can have the correct dimensions and still operate poorly if its frame is twisted or bowed.
Step 6: Adjust the Strike-Side Jamb
Once the hinge side is stable, adjust the strike side.
Close the door and inspect the reveal—the visible gap between the slab and jamb. The gap should appear consistent around the top and sides.
Add or adjust shims until the strike-side jamb follows the door evenly, then secure it to the framing.
Step 7: Check the Door Operation and Reveal
Before installing the casing, operate the door several times.
Confirm that:
- The door swings smoothly
- The slab does not rub against the jamb
- The reveal is consistent
- The door does not unexpectedly swing open or closed
- The latch enters the strike plate correctly
This is the best time to make adjustments because the jamb remains accessible.
Step 8: Install the Casing, Lockset, and Hardware
Once the door operates correctly, trim excess shim material and install the casing.
Then install the lockset, strike plate, and remaining hardware. Fill nail holes and finish joints with the appropriate filler or caulk before painting or touching up the surface.
How to Install a Prehung Door
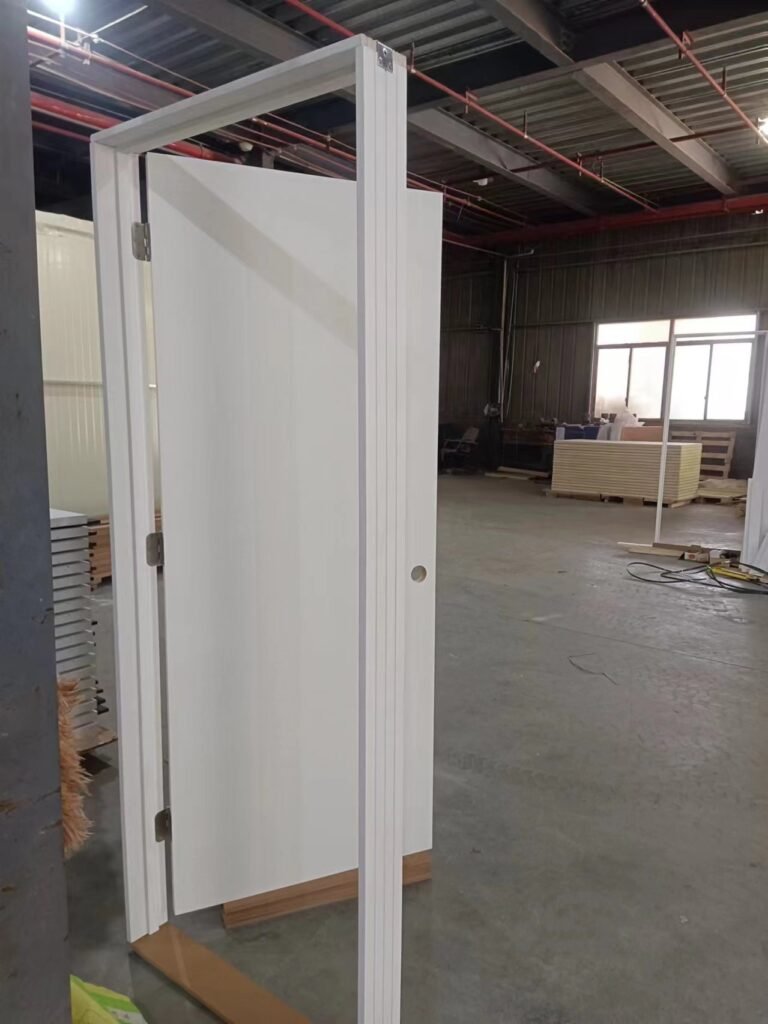
Learning how to install a prehung door is generally simpler than fitting a new slab into an existing jamb because the slab is already mounted to its frame.
The basic process is:
Check the rough opening → position the prehung unit → plumb and shim the hinge jamb → fasten the frame → adjust the strike jamb → check the reveal → test operation → install casing and hardware.
The important point is not to assume that a preassembled door eliminates the need for adjustment. The entire unit still depends on a properly positioned frame.
For a more detailed walkthrough, see our Prehung Interior Door Installation Guide: Steps, Tools & Common Mistakes.
How to Install a Door Frame Correctly
The door frame is one of the most important parts of an interior door installation.
Check the Rough Opening
Confirm the opening dimensions and wall thickness before installing the jamb. The jamb must provide enough adjustment space while matching the finished wall condition.
Keep the Hinge-Side Jamb Plumb
The hinge jamb establishes the position of the door slab. If it leans forward, backward, left, or right, the door may swing by itself or develop uneven gaps.
Position and Secure the Shims
Shims should provide support at critical points, particularly around hinges and the strike area. Fasteners should pass through or close to these supported areas so that tightening them does not distort the jamb.
Maintain an Even Door Reveal
Do not judge the installation by the level alone. Close the door and visually inspect the gap between the slab and frame.
A consistent reveal is one of the easiest ways to identify whether the frame is properly positioned.
Common Interior Door Installation Mistakes
1. Ordering the Door Before Measuring the Rough Opening
Construction drawings are important, but field conditions can differ. Verify actual openings before placing a large door order whenever possible.
2. Choosing the Wrong Jamb Depth
This is particularly important for prehung doors. Different wall constructions require different jamb depths. A jamb that does not match the finished wall thickness creates problems when installing casing.
3. Installing the Hinge Jamb Out of Plumb
This can cause the door to swing on its own, rub against the frame, or produce inconsistent reveals.
4. Using Too Few or Incorrectly Positioned Shims
Shims are structural support points, not simply gap fillers. Poor shim placement can allow the frame to move or distort.
5. Overtightening the Fasteners
Driving screws too aggressively can pull the jamb toward the framing and create a bow. Tighten progressively while checking alignment.
6. Ignoring Finished Floor Height
A door installed before flooring is completed needs sufficient allowance for the final floor system. Failing to account for it can result in inadequate bottom clearance.
7. Installing Casing Before Testing the Door
Do not treat casing as the final adjustment tool. Test the door thoroughly while the jamb and shims are still easily accessible.
In multi-home construction, specification errors can be more costly than individual installation errors because the same mistake can be repeated throughout the project. Confirming door size, wall thickness, jamb depth, handing, and hardware preparation before production is therefore an important part of installation planning.
Interior Door Installation Checklist
Before considering the installation complete, check the following:
- Correct door width and height
- Correct jamb depth
- Correct handing and swing
- Rough opening verified
- Hinge jamb plumb
- Frame square and stable
- Shims properly positioned
- Consistent door reveal
- Lockset and strike aligned
- Adequate floor clearance
- Door opens and closes smoothly
FAQ
What tools do you need to install an interior door?
Common installation tools include a tape measure, 4- or 6-foot level, carpenter’s square, drill/driver, hammer, utility knife, pry bar, pencil, wood shims, and finish nailer or finish nails.
How should you measure the rough opening for an interior door?
Measure the rough opening at multiple points. Check the opening width at the top, middle, and bottom; opening height on both sides; wall thickness; floor level; whether the studs are plumb; and whether the opening is square.
Why must the hinge-side jamb be plumb?
The hinge-side jamb must be installed plumb because it establishes the position of the door slab. If it leans forward, backward, left, or right, the door may swing by itself or develop uneven gaps.
How do you check whether an interior door is installed correctly?
Before installing the casing, operate the door several times. Confirm that the door swings smoothly, the slab does not rub against the jamb, the reveal is consistent, the door does not unexpectedly swing open or closed, and the latch enters the strike plate correctly.
Is a prehung door easier to install than a slab door?
Installing a prehung door is generally simpler than fitting a new slab into an existing jamb because the slab is already mounted to its frame. The unit still needs to be positioned, shimmed, fastened, adjusted, and tested correctly.
What are common interior door installation mistakes?
Common mistakes include ordering the door before measuring the rough opening, choosing the wrong jamb depth, installing the hinge jamb out of plumb, using too few or incorrectly positioned shims, overtightening fasteners, ignoring finished floor height, and installing casing before testing the door.
Conclusion
Successful interior door installation depends less on forcing the door to fit and more on preparing the opening correctly. Accurate measurements, the correct jamb depth, a plumb hinge jamb, properly positioned shims, secure fastening, and consistent reveals are the fundamentals of a reliable installation.
Prehung doors are often efficient for new construction and complete replacements, while slab doors can work well when an existing frame is already in good condition.
For builders handling multiple homes or repeated floor plans, the process should begin before installation day. Confirming rough openings, wall construction, jamb depths, handing, door sizes, and hardware preparation before production can prevent the same installation problem from being repeated across an entire project.