
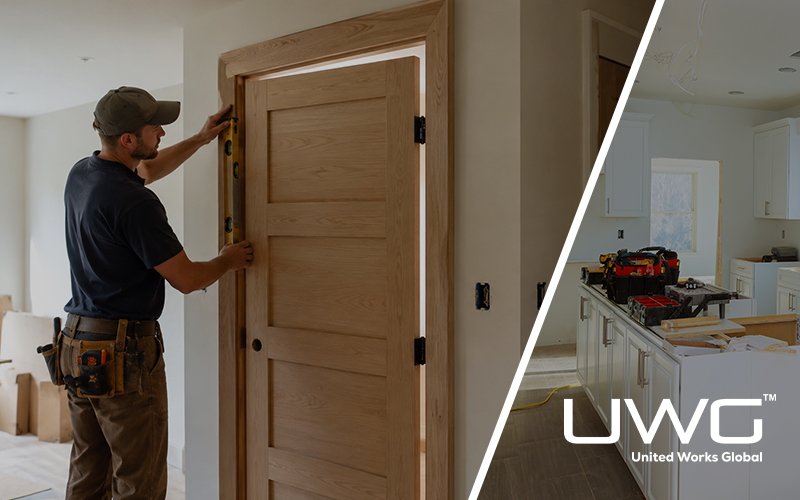
Installing an interior door may seem straightforward, but in real-world projects, improper installation can quickly lead to issues such as uneven gaps, doors that won’t close properly, or even long-term structural problems. For both builders and homeowners, using a prehung door has become the preferred solution because it simplifies the process and reduces the risk of errors.
A 30 x 80 interior prehung door is one of the most common sizes in residential construction. While it comes pre-assembled, correct installation is still critical. This guide will walk you through the process step by step, highlight common mistakes, and share practical insights from real installation scenarios.
What Is a Prehung Door?
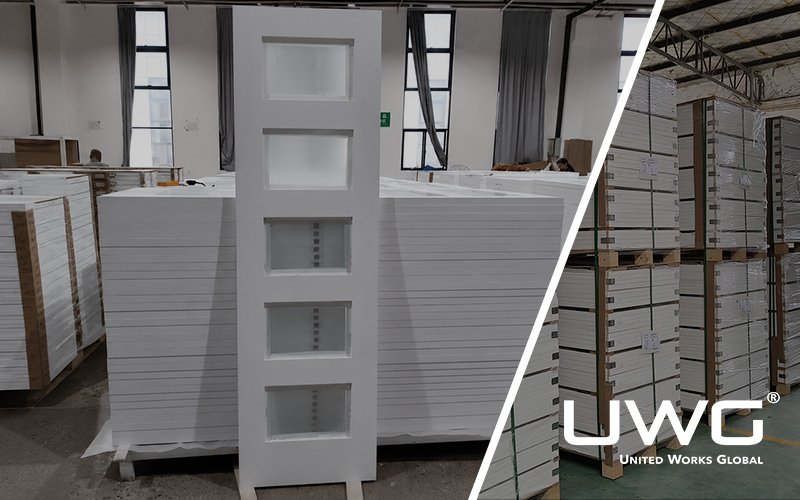
A prehung door is a complete door system that comes already assembled with the frame (jamb), hinges, and door slab. This means the door is factory-aligned and ready to install directly into a rough opening.
Compared to a slab door (just the door panel), a prehung door significantly reduces installation complexity and ensures better alignment from the start. This makes it ideal for both new construction and replacement projects.
Prehung Door vs Slab Door
| Feature | Prehung Door | Slab Door |
|---|---|---|
| Components | Door + Frame + Hinges | Door panel only |
| Installation | Easier | More complex |
| Time Required | Faster | Slower |
| Skill Level | Beginner-friendly | Requires experience |
| Alignment Risk | Low | High |
| Best Use | New construction / replacement | Custom projects |
For most builders and DIY users, prehung doors offer a more efficient and reliable solution.
Tools and Materials Needed
Before starting installation, make sure you have all necessary tools ready:
- Level (spirit level)
- Wood shims
- Screws or nails
- Drill or hammer
- Expanding foam insulation
- Tape measure
- Saw (if adjustment is needed)
Many installation issues occur simply because proper tools were not prepared in advance.
Step-by-Step Installation Process
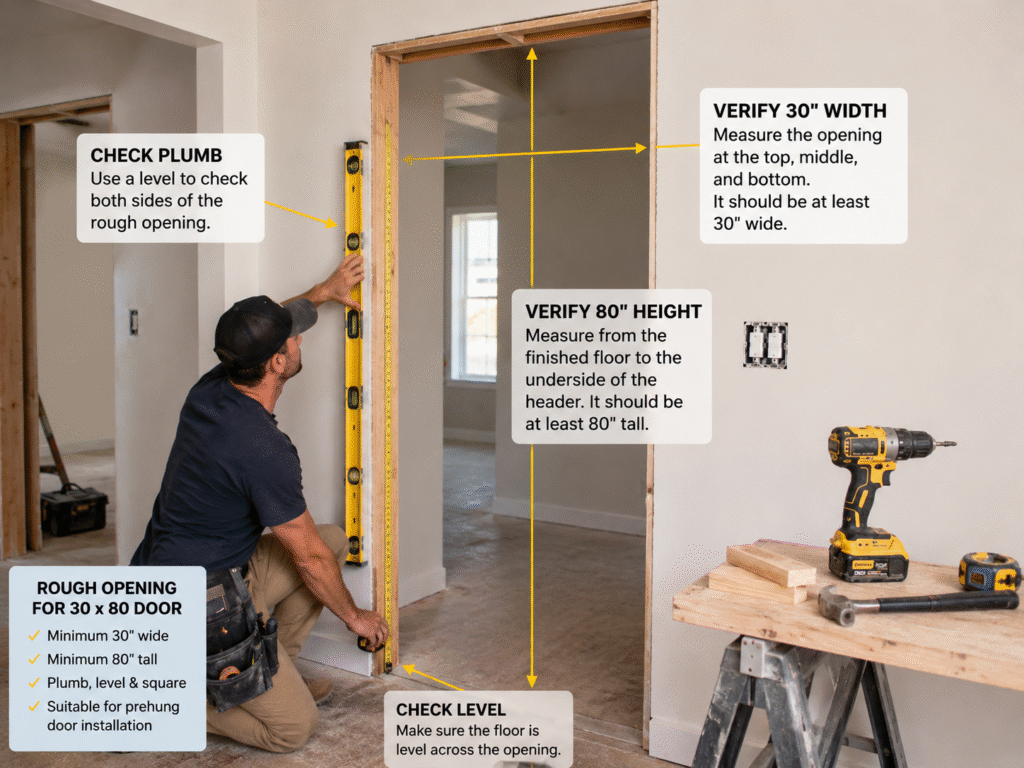
Step 1: Check the Rough Opening
Ensure the rough opening is slightly larger than the door frame. For a 30 x 80 door, the opening should allow space for adjustment.
Check:
- Wall is plumb (vertical)
- Floor is level
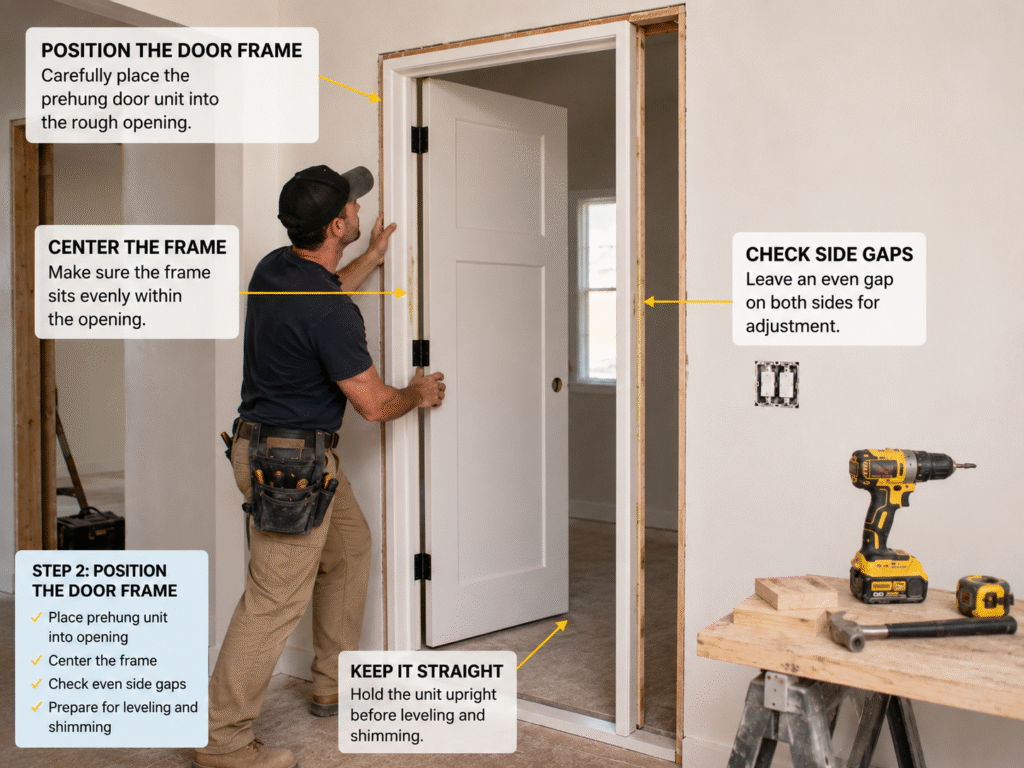
Step 2: Position the Door Frame
Carefully place the prehung door into the opening.
- Center the frame
- Make sure there is an even gap on both sides
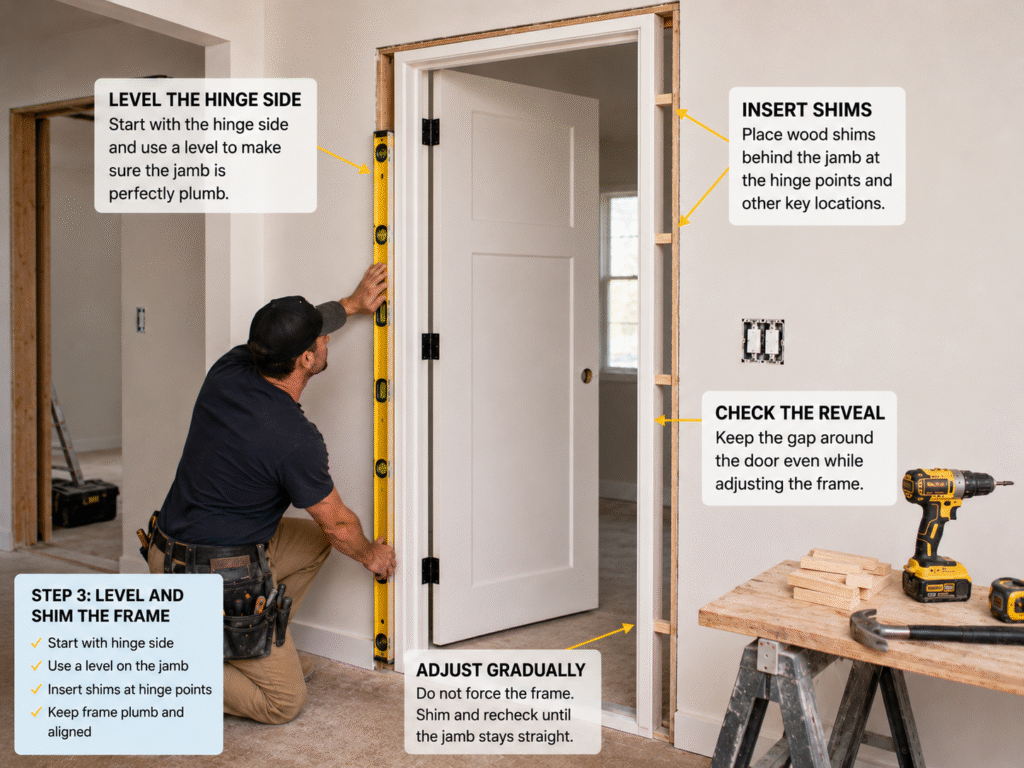
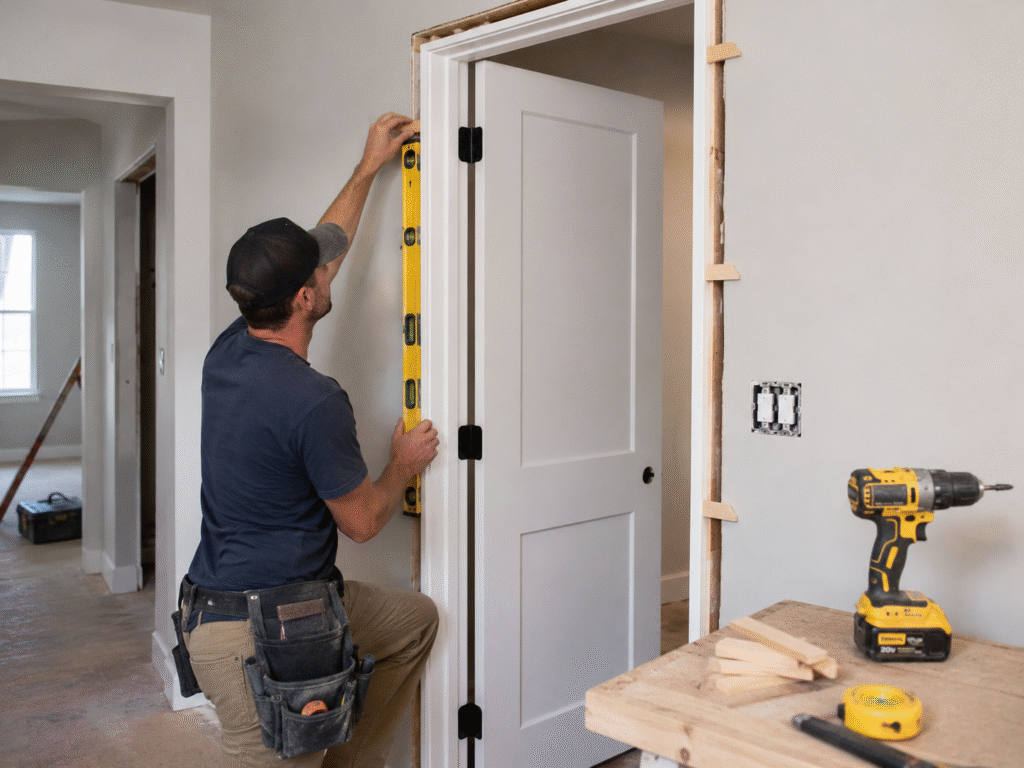
Step 3: Level and Shim the Frame
This is the most critical step.
- Start with the hinge side
- Use a level to ensure it is perfectly vertical
- Insert shims behind hinge points
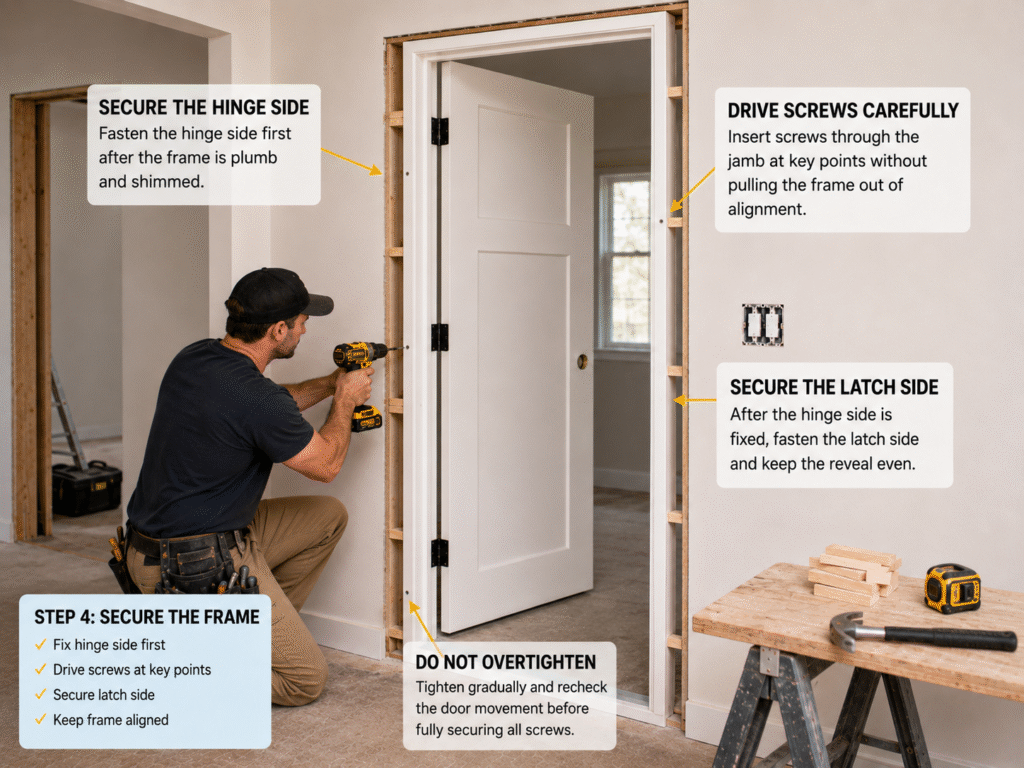
Step 4: Secure the Frame
Once aligned:
- Fix the hinge side first
- Then secure the latch side
- Do not fully tighten all screws at once
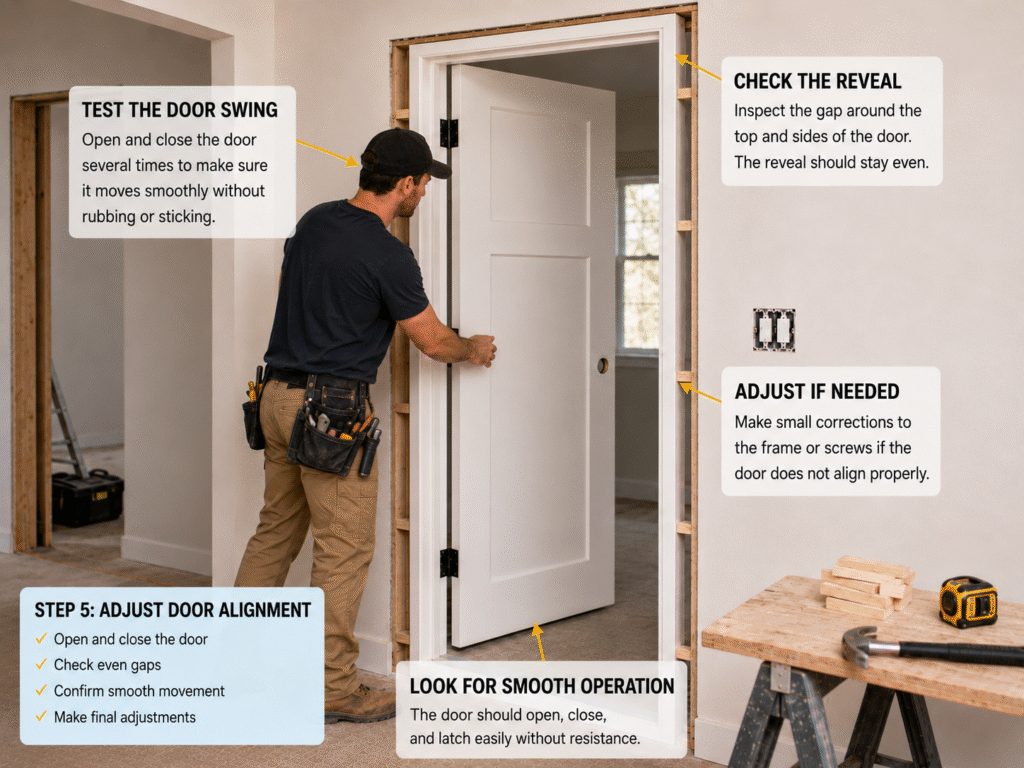
Step 5: Adjust Door Alignment
Open and close the door several times.
Check:
- Smooth operation
- Even gaps around the door (reveal)
Step 6: Final Fixing and Insulation
- Fill gaps with expanding foam
- Trim excess shims
- Prepare for casing installation
Common Installation Mistakes
Even experienced installers can make mistakes. Here are some real-world examples:
❌ Door Swings Open by Itself
Cause: Frame not level 👉 Even a small tilt can cause this issue
❌ Door Won’t Close Properly
Cause: Incorrect shimming or twisted frame
❌ Uneven Gaps Around Door
Cause: Frame not installed plumb
❌ Frame Warping After Installation
Cause: Over-tightening screws or poor material quality
Why Prehung Doors Save Time and Reduce Errors
For builders, prehung doors significantly reduce installation time and labor cost. Since the door slab, frame, and hinges are already factory-assembled, installers can avoid many on-site adjustments, making the installation process faster and more predictable.
For homeowners or DIY users, prehung doors also increase the chances of a successful installation without requiring advanced carpentry skills. The pre-aligned frame helps reduce common problems such as uneven gaps, poor closing, and repeated adjustments.
In one UWG residential project, the contractor originally considered using slab doors to lower the initial material cost. However, after comparing the extra labor required for hinge positioning, frame alignment, and repeated adjustments, they switched to UWG prehung interior doors. The installation became more efficient and consistent, helping the project save labor time while maintaining better overall quality.
This shows that choosing prehung doors is not only about easier installation. For real construction projects, it can also help reduce errors, control labor cost, and improve the final result.
Frequently Asked Questions About Prehung Door Installation
Q: What are the main benefits of using a prehung door instead of a slab door?
A: A prehung door comes as a complete system with the door slab, frame (jamb), and hinges already factory-assembled and aligned. For builders, this significantly reduces installation time and labor costs. It ensures the door is perfectly mortised and balanced from the start, which minimizes on-site alignment errors and prevents common issues like uneven reveals or doors that fail to latch.
Q: Why is leveling the hinge side the most critical step in installation?
A: The hinge side of the door frame bears the entire weight of the door slab. If the hinge jamb is not perfectly plumb (vertical) and level, gravity will cause the door to either swing open or shut on its own. Using a spirit level and high-quality wood shims to secure the hinge side first ensures that the door remains stable and operates smoothly throughout its entire service life.
Q: How do wood shims help improve the long-term performance of the door?
A: Shims are used to bridge the gap between the door frame and the rough wall opening. By inserting shims behind the hinge points and the strike plate, you create a solid structural bridge that prevents the frame from bowing or twisting when you tighten the installation screws. This stability is essential for maintaining consistent gaps and ensuring the door does not “rub” against the frame after the house settles.
Q: What should I do if the prehung door swings open by itself after installation?
A: If a door swings open or shut by itself, it usually means the frame is not perfectly plumb. Even a small tilt of a few millimeters can cause this ghost-swinging. To fix this, you may need to loosen the installation screws, adjust the shims on the hinge side to bring the frame back to a perfect vertical position, and then re-secure it. Partnering with a precise supplier like M4B ensures your door frames are manufactured to tight tolerances, making these on-site adjustments much easier.
Conclusion
Installing a 30 x 80 prehung interior door is not complicated, but precision is essential. The key to success lies in proper leveling, accurate alignment, and careful fixing.
By following the correct steps and avoiding common mistakes, both builders and homeowners can achieve a clean, professional installation. In the end, a well-installed door not only improves functionality but also enhances the overall quality of the space.
Articles that you may be interested in:
Barn Doors for Interiors: Materials, Tracks, and Installation Tips
Why Do Doors Rub or Stick After Installation in New Construction Projects?